Interaction Steps
Configure Interaction Steps (For Dynamic Content)
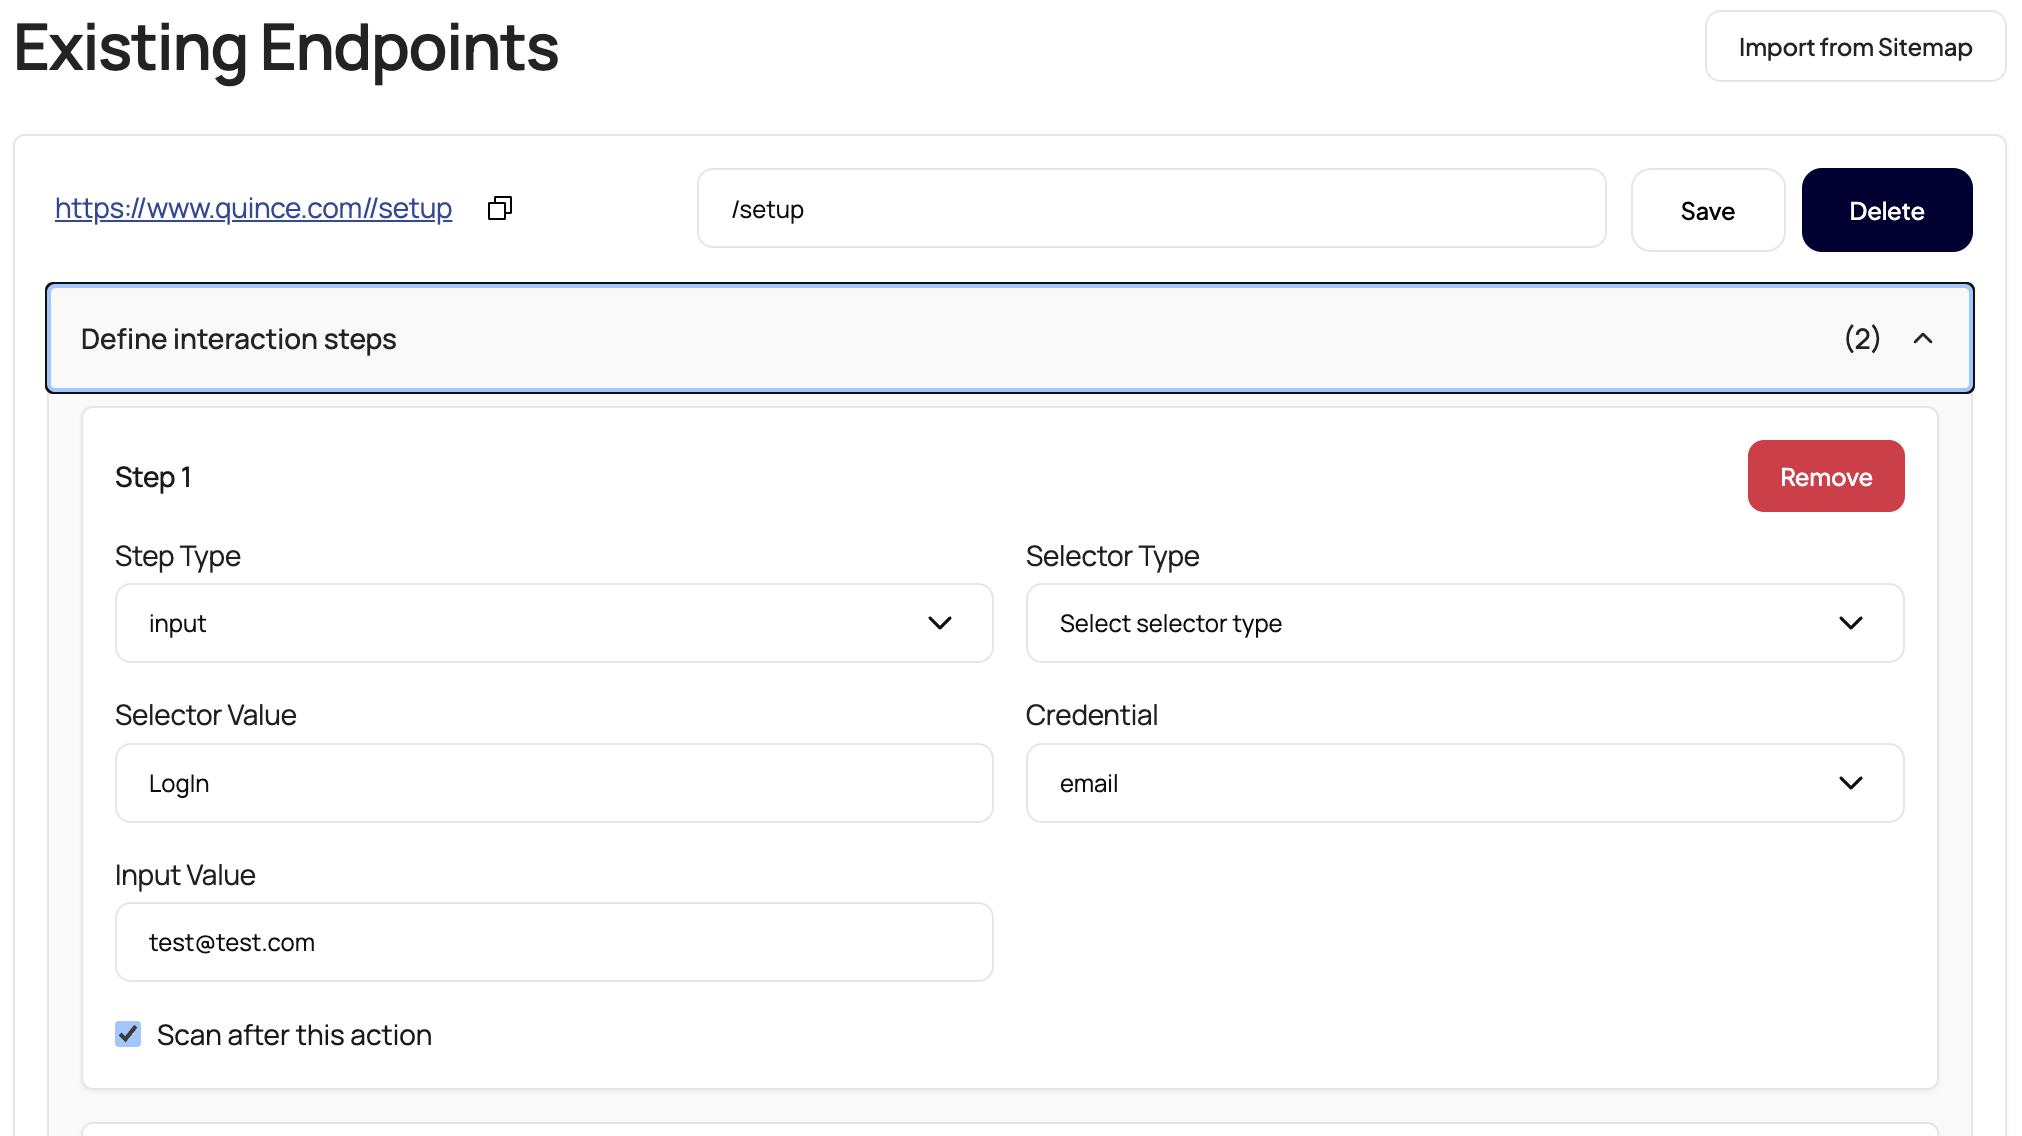
Adding Login Steps
-
Click "Define Interaction Steps" on your endpoint
-
Add an Input step for username/email:
-
Step Type:
Input -
Selector Type:
ID,Name, or leave blank forinputType -
Selector Value: (e.g.,
loginfor ID, orLogInfor inputType) -
Input Value: Your test username/email
-
Credential:
emailorusername(for secure storage) -
Scan After Action: ✓ (check if you want to scan after this step)
-
-
Add another Input step for password:
-
Step Type:
Input -
Input Type:
Password -
Input Value: Your test password
-
Scan After Action: ✓
-
-
Add a Click step for the login button (if needed):
-
Step Type:
Click -
Selector: Login button ID or class
-
Adding Navigation Steps
For navigating through your application:
-
Click steps:
json
{ "type": "click", "selector": { "type": "id", "id": "submit-button" }, "scanAfterAction": true } -
Input steps:
json
{ "type": "input", "value": "search term", "selector": { "type": "id", "id": "search-field" }, "scanAfterAction": false } -
Wait steps:
json
{
  "type": "wait",
  "duration": 2000
}
Example: Complex User Flow
For a multi-step process with authentication:
json
{
  "url": "https://www.yoursite.com/app",
  "steps": [
    {
      "type": "input",
      "credential": "email",
      "value": "test@example.com",
      "selector": {
        "type": "id",
        "id": "email-input"
      },
      "scanAfterAction": false
    },
    {
      "type": "input",
      "value": "SecurePassword123",
      "selector": {
        "inputType": "Password"
      },
      "scanAfterAction": false
    },
    {
      "type": "click",
      "selector": {
        "type": "id",
        "id": "login-btn"
      },
      "scanAfterAction": true
    },
    {
      "type": "click",
      "selector": {
        "type": "class",
        "class": "dashboard-link"
      },
      "scanAfterAction": true
    }
  ]
}