Sitemap
Spotlight is TestParty's production-level accessibility scanner that runs automated tests on your live website or staging environments. It generates a YAML file that integrates with your CI/CD pipeline (GitHub Actions, GitLab CI, BitBucket Pipelines, or Jenkins) to run nightly scans.
Prerequisites
Before setting up Spotlight, you'll need:
-
Admin access to TestParty dashboard
-
Access to your GitHub/GitLab/BitBucket repository
-
List of URLs to scan OR your sitemap.xml file
-
Test account credentials (if scanning pages behind authentication)
-
Repository permissions to add secrets and workflows
Step 1: Access the Continuous Integration Setup
-
Log into the TestParty dashboard at https://testparty.ai
-
Navigate to the Continuous Integration tab in the main menu
-
Click on the Sitemap section

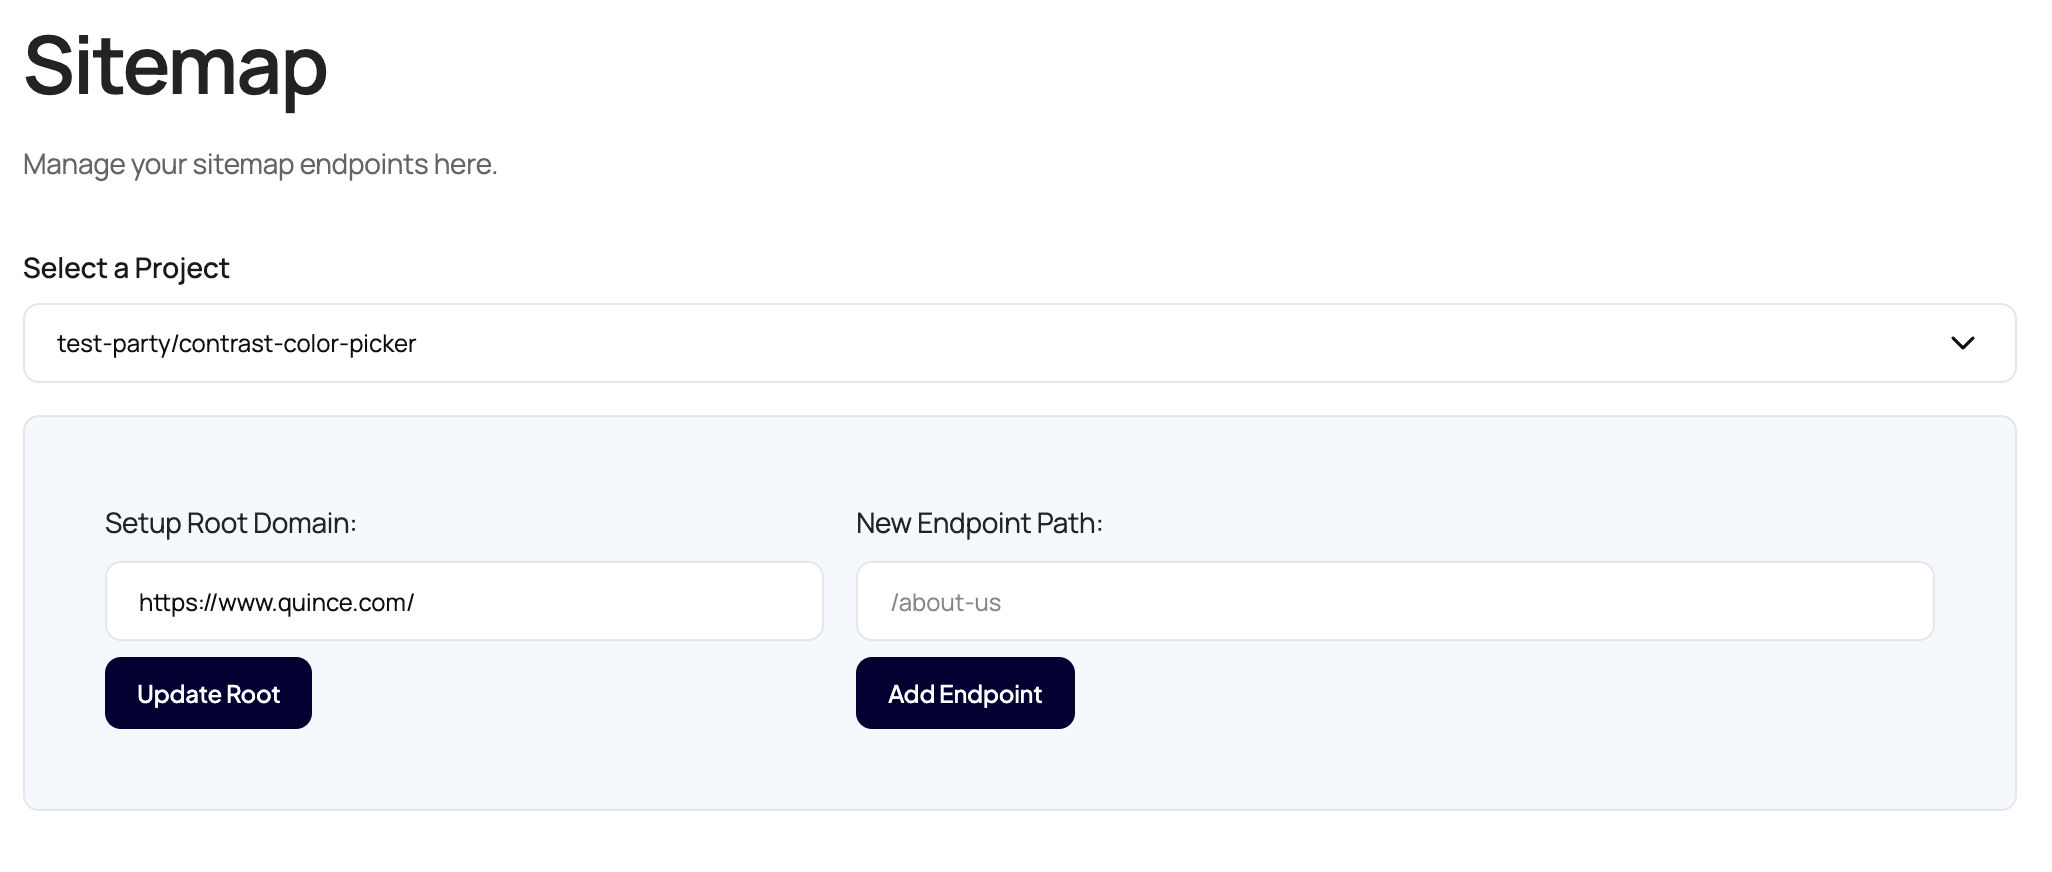
Step 2: Configure Your Root Domain
Basic Setup (Public Pages)
-
In the "Root Domain" field, enter your base URL
-
Example:
https://www.yoursite.com/ -
Important: Include the trailing slash
/
-
-
Click "Update Root" to save
Setup with Authentication
If you need to scan pages behind a login:
-
Set your main domain as the root (e.g.,
https://app.yoursite.com/) -
In the "Setup Endpoint" section, add your login page
-
Example:
login.aspxor/auth/login
-
-
Click "Set Root" on the setup endpoint
Step 3: Add Endpoints to Scan
Method 1: Manual URL Entry
-
In the "Endpoint Path" field, add each page path you want to scan
-
Example:
/products,/checkout,/dashboard -
Do NOT include the domain or leading slash if your root domain ends with
/
-
-
Click "Add Endpoint" for each URL
-
Repeat for all pages you want to scan
Method 2: Using XML Sitemap
If you have a sitemap.xml file:
-
TestParty can automatically import all URLs from your sitemap
-
Provide the sitemap URL (e.g.,
https://yoursite.com/sitemap.xml) -
The system will parse and add all URLs automatically
Method 3: Complex User Flows
For single-page applications or complex navigation:
-
Add your main URL as the endpoint
-
Click "Define Interaction Steps" next to the endpoint
-
Add navigation steps (detailed in Step 4)
Step 4: Configure Interaction Steps (For Dynamic Content)
See our section on Interaction Steps for more.
Step 5: Generate the YAML Configuration
-
After configuring all URLs and steps, click "Generate YAML"
-
The system creates a GitHub Actions workflow file
-
The generated YAML structure will look like:
yaml
name: TestParty Reporter
on:
  schedule:
    - cron: '0 10 * * *'  # Runs at 10 AM UTC daily
  workflow_dispatch:      # Allows manual triggering

jobs:
  test:
    runs-on: ubuntu-latest
    steps:
      - uses: actions/checkout@v2
      - name: TestParty Reporter
        uses: test-party/reporter@v0.0.1-alpha.5
        with:
          testparty_token: ${{ secrets.TESTPARTY_TOKEN }}
          repository_name: ${{ github.repository }}
          repository_id: ${{ github.repository_id }}
          urls: |
            [
              {
                "url": "https://www.yoursite.com/",
                "steps": []
              },
              {
                "url": "https://www.yoursite.com/products",
                "steps": []
              },
              {
                "url": "https://www.yoursite.com/secure-area",
                "steps": [
                  {
                    "type": "input",
                    "credential": "email",
                    "scanAfterAction": true,
                    "value": "test@test.com",
                    "selector": {
                      "inputType": "LogIn"
                    }
                  },
                  {
                    "type": "input",
                    "scanAfterAction": true,
                    "value": "TestPassword",
                    "selector": {
                      "inputType": "Password"
                    }
                  }
                ]
              }
            ]
          setup: |
            []
          teardown: |
[]Key YAML Components:
-
schedule: Cron expression for automated runs
-
workflow_dispatch: Enables manual triggering
-
testparty_token: References your secret API token
-
urls: Array of URL objects with optional steps
-
setup/teardown: Optional arrays for pre/post scan actions
Step 6: Set Up API Token
-
In TestParty dashboard, navigate to Continuous Integration → Sitemap → API Token
-
Copy your unique API token
-
Add it as a repository secret:
For GitHub:
-
Go to Repository → Settings → Secrets and variables → Actions
-
Click "New repository secret"
-
Name:
TESTPARTY_TOKEN(exact capitalization required) -
Value: Paste your API token
-
Click "Add secret"
For GitLab:
-
Go to Settings → CI/CD → Variables
-
Click "Add variable"
-
Key:
TESTPARTY_TOKEN -
Value: Your API token
-
Check "Mask variable"
For BitBucket:
-
Go to Repository settings → Pipelines → Repository variables
-
Name:
TESTPARTY_TOKEN -
Value: Your API token
-
Check "Secured"
(REVIEW) Step 7: Deploy to Your CI/CD Pipeline
GitHub Actions
-
In TestParty, click "Commit YAML to GitHub"
-
This attempts to automatically create the workflow file
-
-
If automatic commit fails:
-
Copy the generated YAML
-
In your repository, create:
.github/workflows/testparty-scan.yml -
Paste the YAML content
-
Commit and push
-
Handling Permission Errors:
If you see "Cannot find test-party/reporter in marketplace":
-
Your organization restricts GitHub Actions
-
Contact your SCM/DevOps team
-
Request allowlisting of:
test-party/reporter@v0.0.1-alpha.5 -
Provide context: "Required for automated accessibility compliance testing"
GitLab CI
Add to .gitlab-ci.yml:
yaml
testparty-scan:
  image: ubuntu:latest
  script:
    - curl -X POST https://api.testparty.ai/scan
      -H "Authorization: Bearer $TESTPARTY_TOKEN"
      -d @scan-config.json
  only:
- schedulesJenkins
Create a new pipeline with:
groovy
pipeline {
    agent any
    triggers {
        cron('0 10 * * *')
    }
    stages {
        stage('Accessibility Scan') {
            steps {
                sh '''
                    curl -X POST https://api.testparty.ai/scan \
                    -H "Authorization: Bearer ${TESTPARTY_TOKEN}" \
                    -d @scan-config.json
                '''
            }
        }
    }
}(REVIEW) Step 8: Run Your First Scan
Manual Trigger (GitHub Actions)
-
Navigate to repository → Actions tab
-
Select "TestParty Reporter" workflow
-
Click "Run workflow" dropdown
-
Select branch (usually
main) -
Click green "Run workflow" button
-
Monitor progress in the workflow run
Verify Successful Execution:
-
Green checkmark = Success
-
Red X = Failed (check logs)
-
Yellow circle = Running
Common First-Run Issues:
-
Token not found: Verify
TESTPARTY_TOKENsecret is set -
Reporter not found: Need to allowlist the action
-
URLs unreachable: Check network/firewall settings
Step 9: View Results
-
Return to TestParty dashboard
-
Navigate to Reports section
-
Find your scan (named by timestamp)
-
Each scan provides:
-
Executive Summary: High-level metrics
-
Detailed Issues: Categorized by severity
-
Screenshots: Visual evidence with bounding boxes
-
Code Suggestions: Fixes for each issue
-
Export Options: CSV, PDF, or create tickets
-
Report Sections:
-
Critical Issues: Must fix immediately (legal risk)
-
Serious Issues: Should fix soon (user impact)
-
Low Issues: Good to fix (best practices)
(REVIEW) Step 10: Schedule Ongoing Scans
Modify Scan Frequency:
Edit the cron expression in your YAML:
yaml
schedule:
  - cron: '0 2 * * *'      # Daily at 2 AM
  - cron: '0 */6 * * *'    # Every 6 hours
  - cron: '0 9 * * 1-5'    # Weekdays at 9 AM
  - cron: '0 0 * * 0'      # Weekly on Sunday
  - cron: '0 0 1 * *'      # Monthly on the 1st
Cron Format: minute hour day-of-month month day-of-week
Best Practices for Different Architectures
Single Page Applications (SPAs)
For apps where URL doesn't change (like UKG):
json
{
  "url": "https://app.yoursite.com/",
  "steps": [
    {"type": "click", "selector": {"id": "nav-products"}, "scanAfterAction": true},
    {"type": "click", "selector": {"id": "nav-settings"}, "scanAfterAction": true},
    {"type": "click", "selector": {"id": "nav-reports"}, "scanAfterAction": true}
  ]
}Multi-Page Applications
For traditional websites with distinct URLs:
json
[
  {"url": "https://site.com/", "steps": []},
  {"url": "https://site.com/products", "steps": []},
  {"url": "https://site.com/about", "steps": []},
  {"url": "https://site.com/contact", "steps": []}
]Authenticated Areas
For sections requiring login:
json
{
  "url": "https://app.site.com/dashboard",
  "steps": [
    {"type": "input", "credential": "email", "value": "${{ secrets.TEST_EMAIL }}", "selector": {"id": "email"}},
    {"type": "input", "value": "${{ secrets.TEST_PASS }}", "selector": {"id": "password"}},
    {"type": "click", "selector": {"id": "login"}, "scanAfterAction": true}
  ]
}(REVIEW) Troubleshooting
Debug Mode
Add to your YAML for verbose logging:
yaml
with:
  debug: true
testparty_token: ${{ secrets.TESTPARTY_TOKEN }}Common Selector Issues
If elements aren't found:
-
Use browser DevTools to verify selectors
-
Try different selector types:
-
id: Most reliable -
class: For multiple elements -
inputType: For form fields -
custom: CSS selectors
-
Handling Dynamic Content
For JavaScript-heavy sites:
json
{
  "steps": [
    {"type": "wait", "duration": 3000},
    {"type": "click", "selector": {"id": "dynamic-button"}}
  ]
}Support Resources
-
Office Hours: Book via TestParty dashboard
-
Slack Support: Direct channel with TestParty team
-
Documentation: https://docs.testparty.ai
-
Email: support@testparty.ai
-
Emergency: For P0 issues, use Slack with @channel
Remember: This is a one-time setup. Once configured, Spotlight runs automaticaly on your schedule, continuously monitoring accessibility without manual intervention.